|
<< Click to Display Table of Contents >>
|
  
|
1.Click “Add New Job” on Dashboard home screen or on the Job Listing page

2.Complete all required (*) fields, including these job-related items:
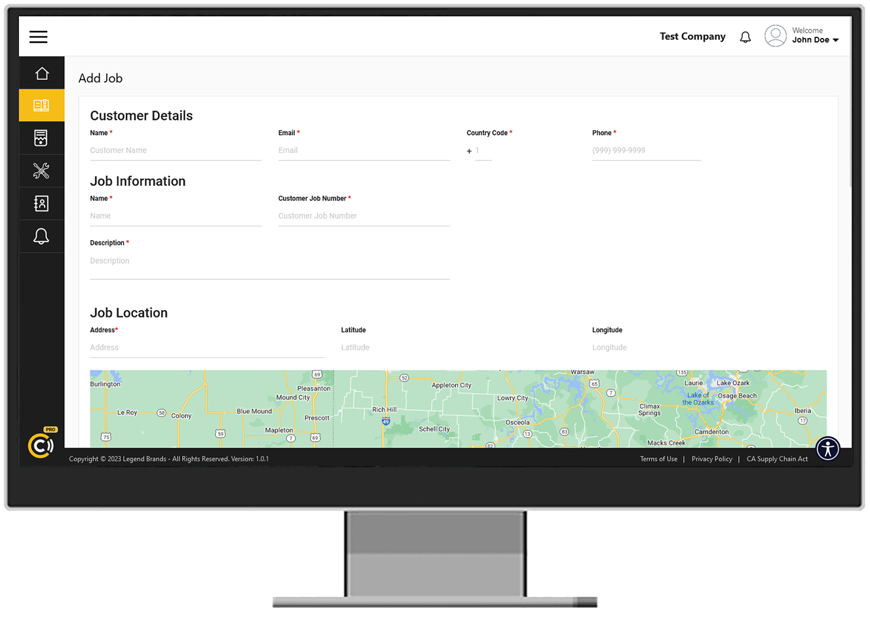
a)Job Information Name: Enter unique job name
b)Customer Job Number (generated by your company)
c)Description: Type of loss/services
d)Job Location Address: Auto-populates when recognized street address is entered
e)Estimated Job Duration (can be edited later)
f)Job Lead and Job Technician: Enter or click “Select User” to choose from Users already in system, or enter name and email. Leads and Techs can view only the company jobs to which they are assigned.
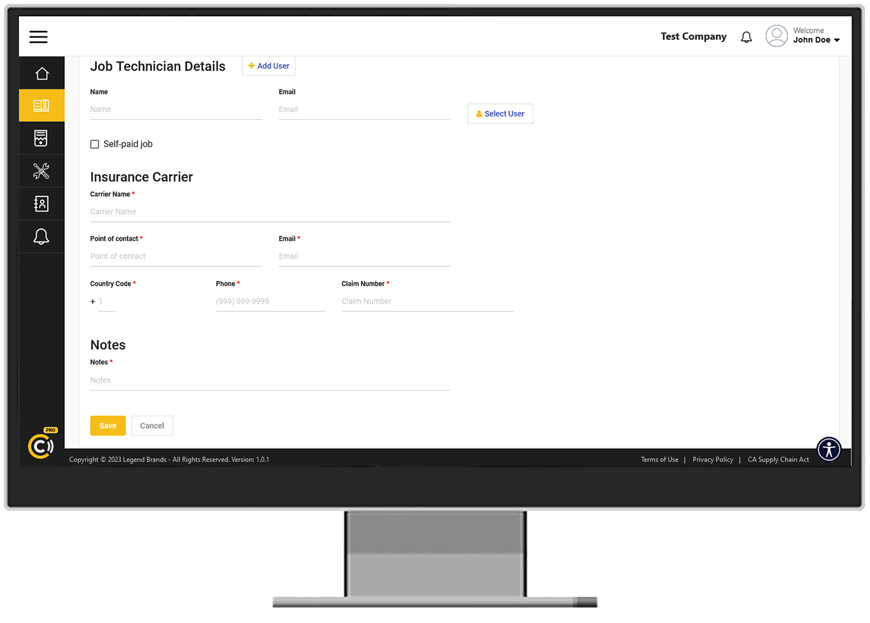
g)Select “Self-paid job” OR enter Insurance Carrier plus contact information
h)Enter Notes (can also be edited later – see “Edit Jobs”:
•Notes: For more general notes on the project, that could relate to office functions, communications with other parties related to the job, etc.
•On Site Notes: For notes unique to the physical job site, eg, demolition, processes, issues, etc.
i)Click “Save” (ALWAYS click Save before leaving the page!)
3.Job shows as “Pending” until user Starts the job. (Once a Job is “Started”, the Status on the Job Listing page for that job will change from “Pending” to “Active”)