|
<< Click to Display Table of Contents >> DrizAir 1200 Instructions |
  
|
|
<< Click to Display Table of Contents >> DrizAir 1200 Instructions |
|
DrizAir 1200 Instructions #1 |
|||
Check Control Panel version
1. Using a Philips screwdriver, remove the four screws that secure the control panel to the unit housing.
2. Lift the control panel upward to identify the version of the DrizAir 1200 control panel using the following information: |
|
||
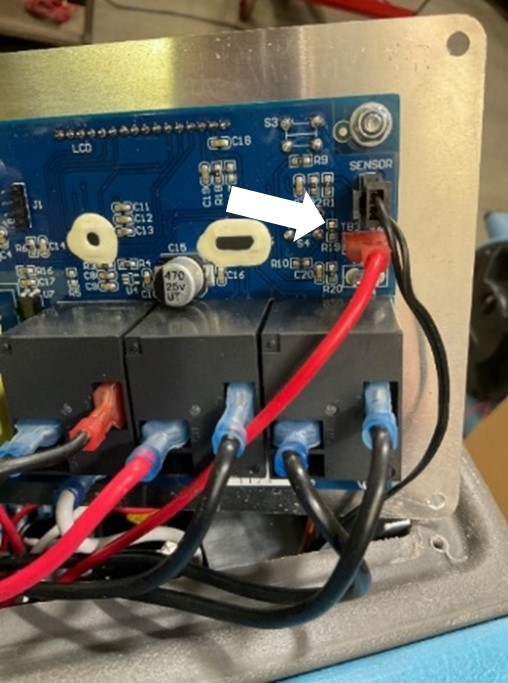
If the original control panel includes the red lead wire from the pump attached to terminal TB3 or has a label on the PCBA identifying part number 126946, continue with the instructions on this page.
If the original control panel is not the 126946 control panel, skip to DrizAir 1200 Instructions #2.
Note: If the control panel was replaced with a 126946 control panel, the wiring may not match exactly as shown in the photo, for example, the red lead wire from the pump may not be attached to TB3.
|
|
||
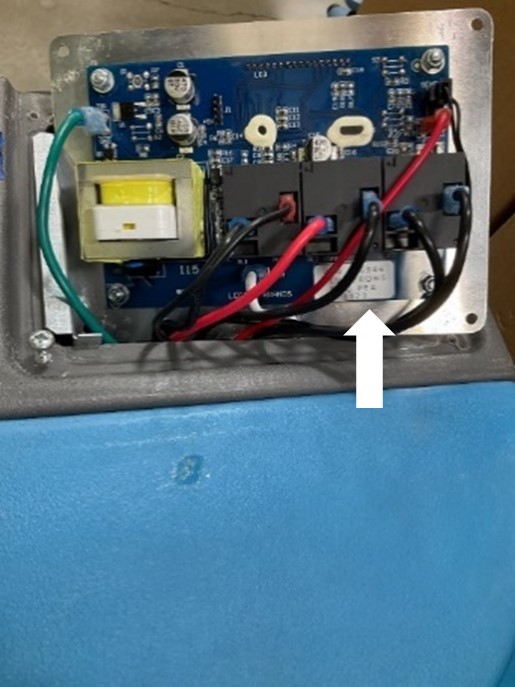
1. Remove all wires attached to the original control panel and reattach them to the new control panel at the same locations. It may be necessary to use needle nose pliers to remove the terminals attached to the original control panel relays.
Note: If this is not the first time the control panel in the unit has been replaced with a 126946 control panel, the wiring may not match exactly as shown in the photo.
2. Secure the control panel to the unit using the four screws. The control panel replacement is complete.
3. Test the unit for proper operation before returning the unit to service.
|
|
||